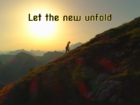
Channel art makes your channel pleasing to the eye as well as creating a memorable impression on your subscribers. It’s like having a virtual billboard at the top of your channel. Creating channel art is quite simple.
With these four steps, you can create stunning channel art that will wow your subscribers.
1. Learn how to add custom channel art.
The programming on YouTube makes the channel art space blank by default. There is a gray button in the middle of a gray box at the top that states “add channel art.” This is like adding photos or art to your Facebook or Google+ page. It pops up with an upload photo tab. It can also look through photos you have added to your Google+ account or gallery.
Go wild! Many YouTubers, such as Niki and Gabi, change their art to go in tune with the season. Others do it with photos that mean something to them, such as how Shane Dawson set his book’s cover as his channel art.
Here is a video to show you how to change your channel art.
2. Keep your channel art the recommended size.
Images need to be in a certain pixel size. If you don’t meet the correct size in pixels, then the pictures will turn out gray or grainy. Check the images in your photo, by right clicking, to see what pixel sizes they are.
Plenty of YouTubers, such as MissTiffanyMa and Emily Dao, make their own channel art. Be sure to keep your design to the recommended size of 2560×1440 pixels.
This video shows you a simple way to fix the pixels in your pictures.
3. Check how your channel art looks on different devices.
Your viewers access your videos through lots of different devices. The art that you choose for your channel will look different across all of these different phones and computers. Most devices will show a narrow panorama of your picture. On a web-enabled TV, it will make your pictures look even bigger!
You can get an idea of what the pictures will look like by previewing what it will look like on different devices. Ask your friends to check out your channel art on their phones and laptops and send you screenshots so that you can compare them.
This video helps you look at previews of your channel art.
4. Crop the pictures so that they look just right.
From the same panel, you can crop your pictures in such a way that it pops on your page! If you have ever cropped pictures on Facebook, this is the same idea.
A clear section will pop up on your picture, and you can move it around the initial picture to choose the perfect part. Once you have selected the area you want to focus on in your picture, click the preview button to see how it will look on your channel.
This video shows you how to create channel art in Canvas.
Creating channel art is quite a simple process and will help boost your channel’s memorability and grab viewers’ attention.
Interested in getting your YouTube video discovered by masses of targeted fans? Click this link: www.promolta.com.
Emily Thornton is an English Teacher who has a love of Journalism. She loves to read, write, and watch videos (music and fails).


Leave a Comment